How to Draw a Roman Soldier Step by Step Easy
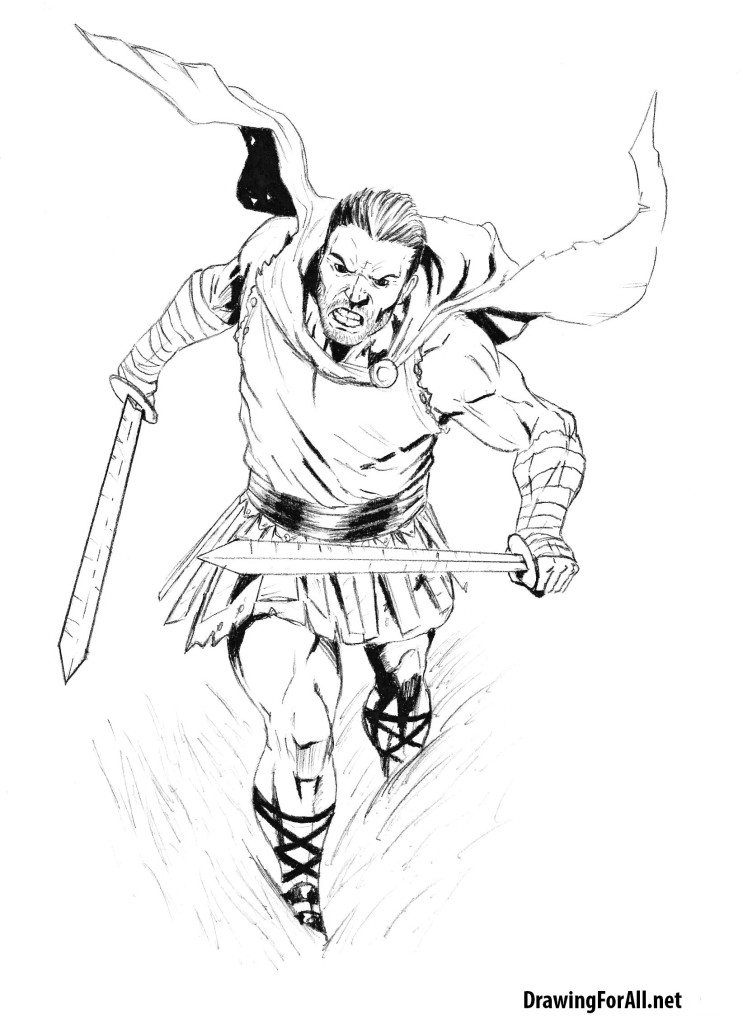
Today we did a drawing lesson in which we will tell you about how to draw a warrior of ancient Rome.We drew warrior in comic book style, but in this drawing lesson there are a large number of small parts. For this reason the picture may seem to you too complicated. However, if the step-by-step to implement our recommendations and check with illustrations of each stage, your Roman soldier will look very impressive.
Step 1
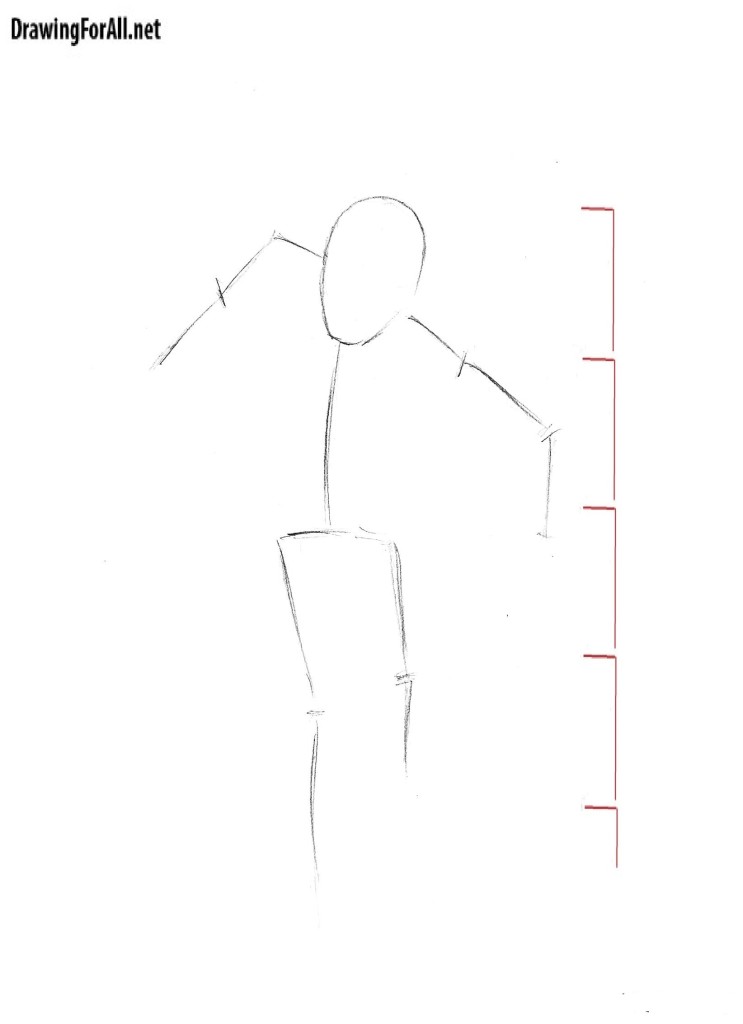
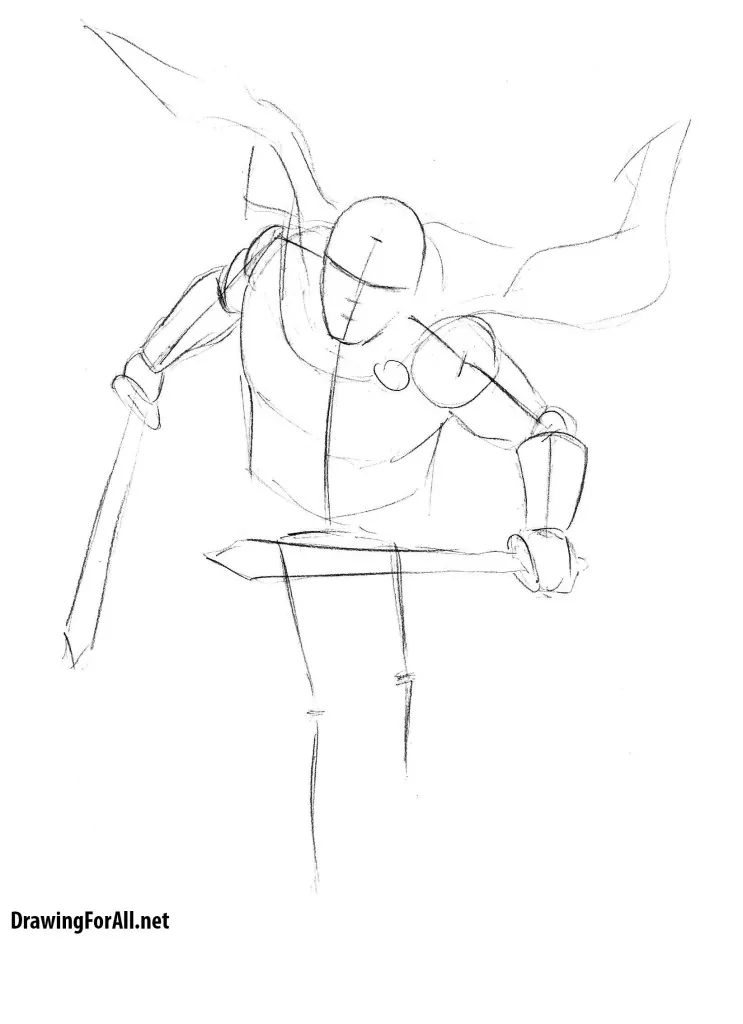
Let's look at the illustration of the first step. We are going to draw a tall man of athletic build. If this man stood at full height, we would have painted the first step just as in the lesson of drawing of Superman. But the Roman soldier is depicted in a dynamic pose. So the proportions here are distorted significantly.
The most important difference from other drawing lessons people, the ratio of the size of the head and the entire body. If a tall young man stands upright, the length of the head equals 1/7 of the length of the body. But here, as you can see, the body is the sum of the lengths of 4.3 heads
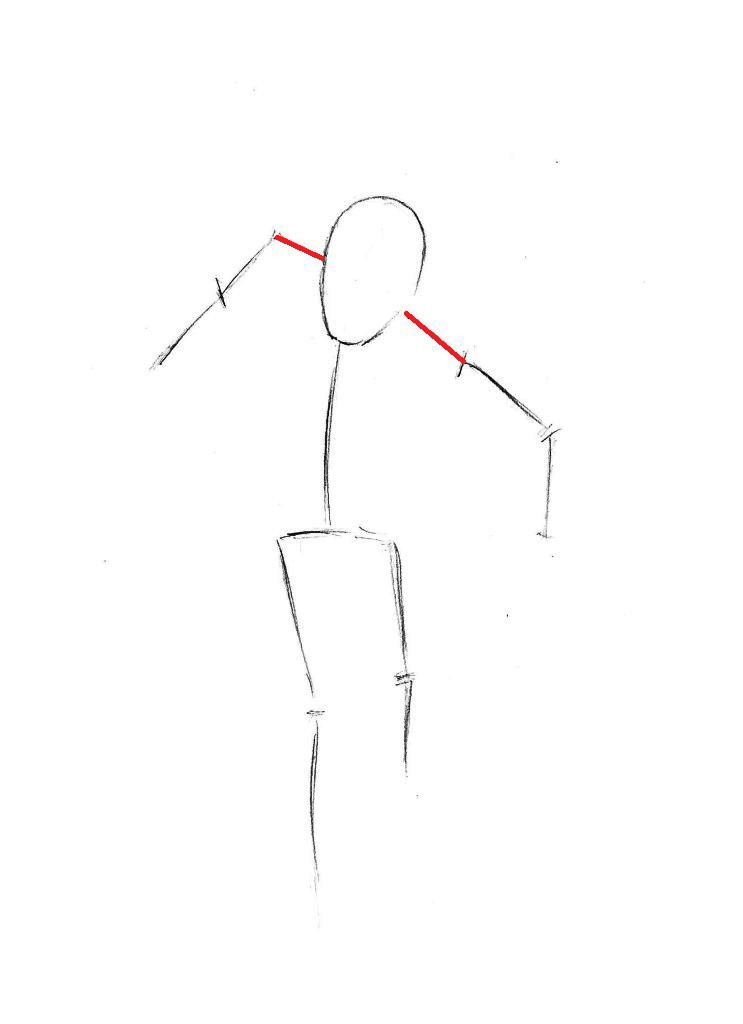
Another important thing – the belt line of the upper extremities is not directly but at an angle.
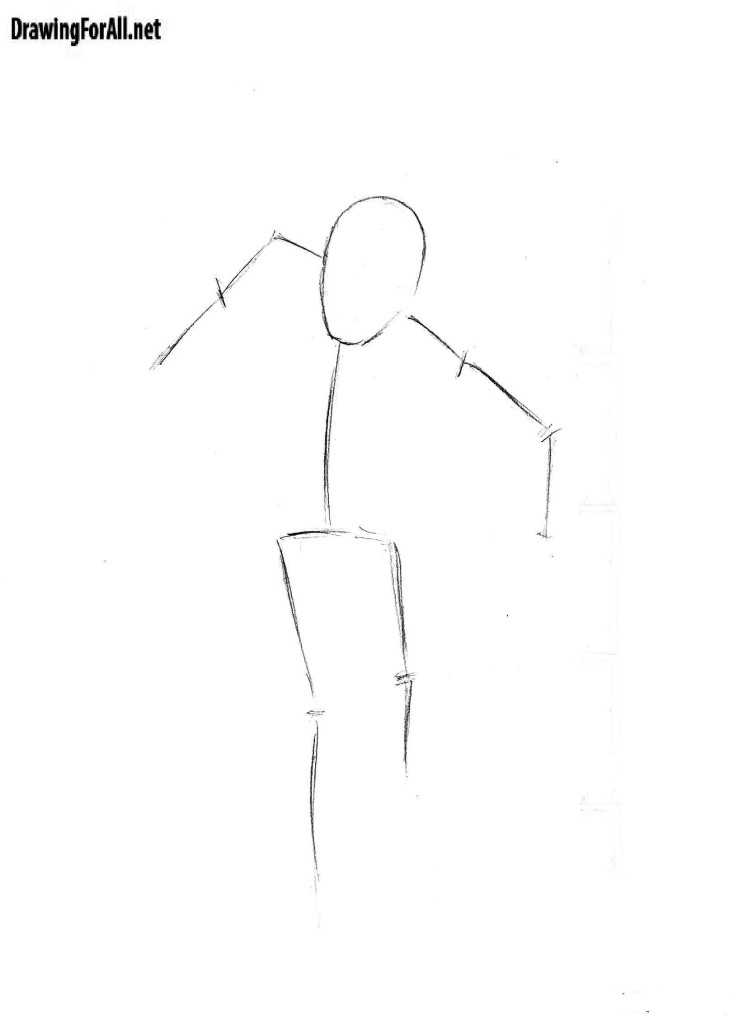
And, of course, you may have noticed that the hands and legs of the Roman soldier have a different length from this perspective.
Step 2
If your sketch is anything like ours, then everything is OK and we can proceed to the second step. First you shoud draw the basic face lines.
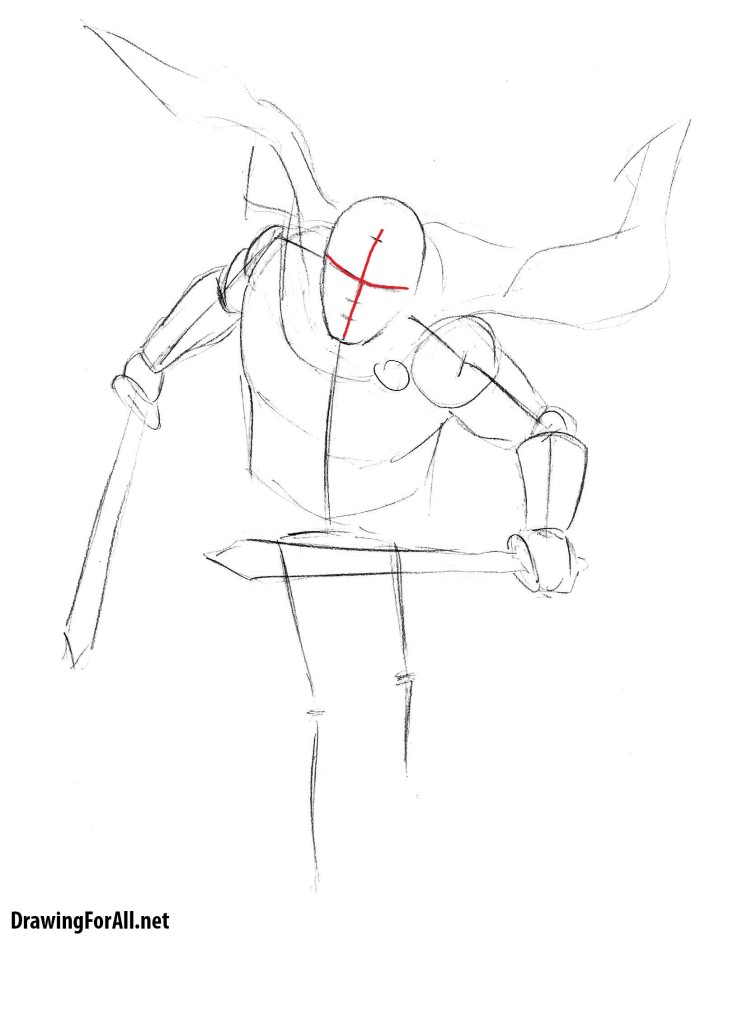
And then draw a secondary facial lines, from the top to down:
- The line showing the location of the hair. This line is much higher than the eye line;
- The line of his nose. It is located under the eye line;
- Line of the mouth. The bottom line of all.
Also in this step we should draw the contours of the upper body of our character. After working with the front lines first, draw balls, which will mark the shoulder joints and massive deltoid muscle of the shoulder. Don't forget to focus on the lines of the first step.
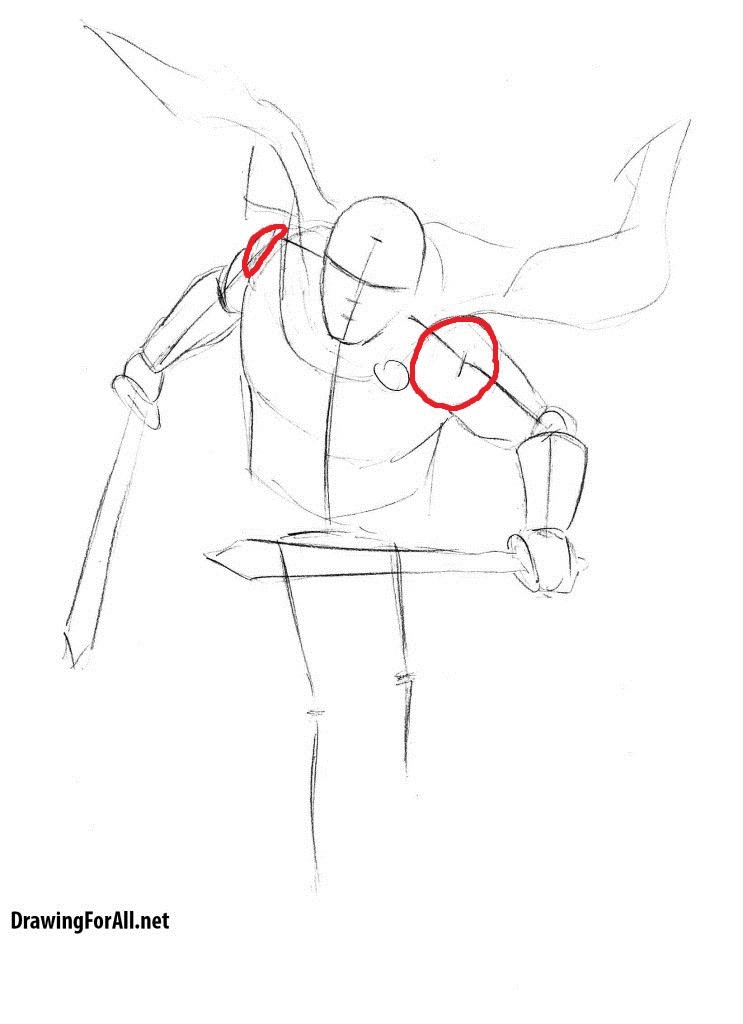
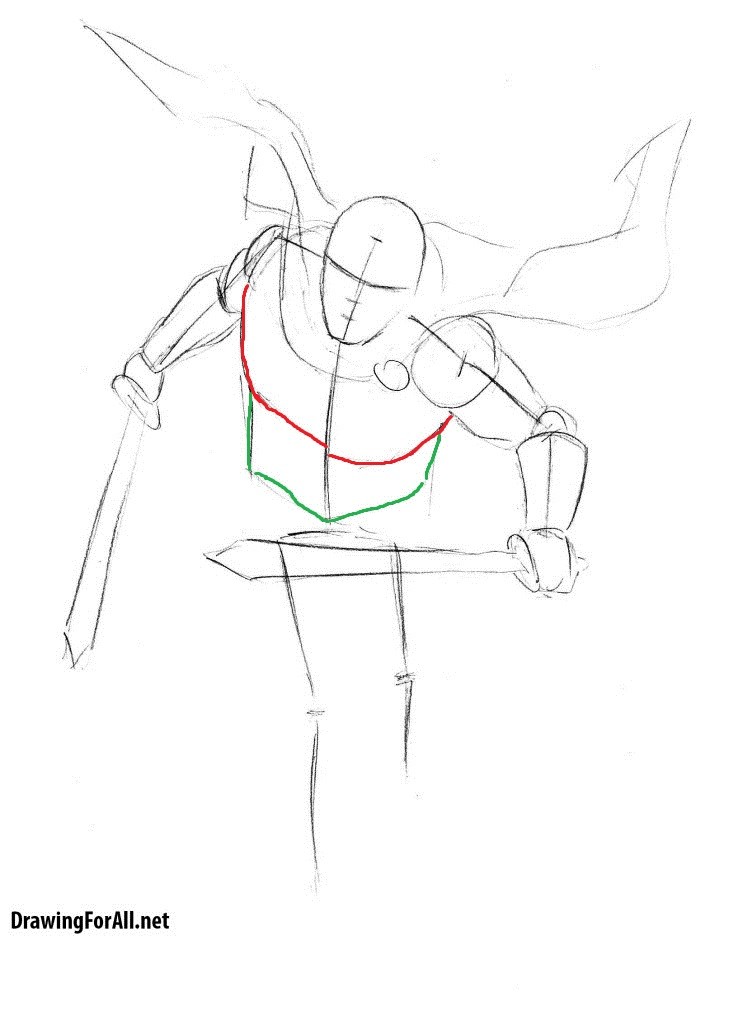
Ok, let's draw the pectoralis major muscle (we marked it red) and the stomach area, which looks like a narrow strip extending laterally.
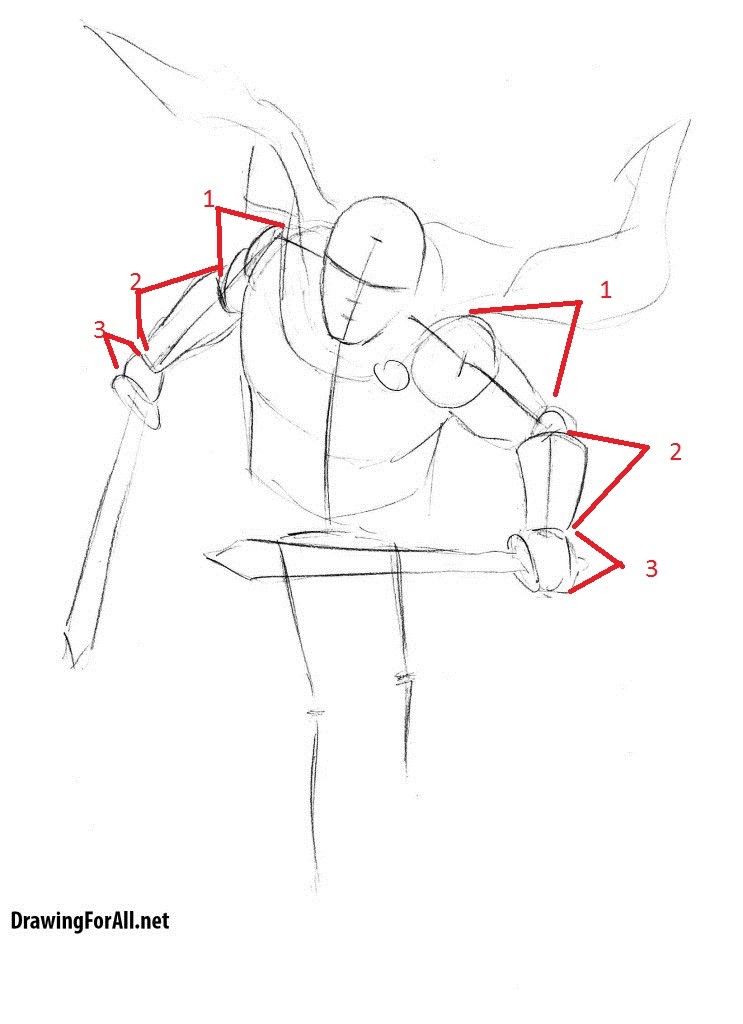
We have almost come to the end of this difficult step. And some words about the arms. In this scheme you can see the numbers:
- 1 – the shoulder. The most extensive and powerful part of the arm;
- 2- the forearm. This part of the hands responsible for the movement of the palm;
- 3 – the palm. In our picture you can see the palm clenched into fists.
Finally, you should draw the contours of the mantle and swords. Please note that the blade near the hilt is narrow, but wide tip.
Step 3
In this step we will draw the legs of a Roman soldier. First let's divide the legs into two parts:
- The femur (or the hip). The most powerful and strongest part of the leg;
- The shin. This part of the leg has a bulge at the expense of the gastrocnemius muscle.
Feet impossible to see because of the grass, which we draw in the following steps.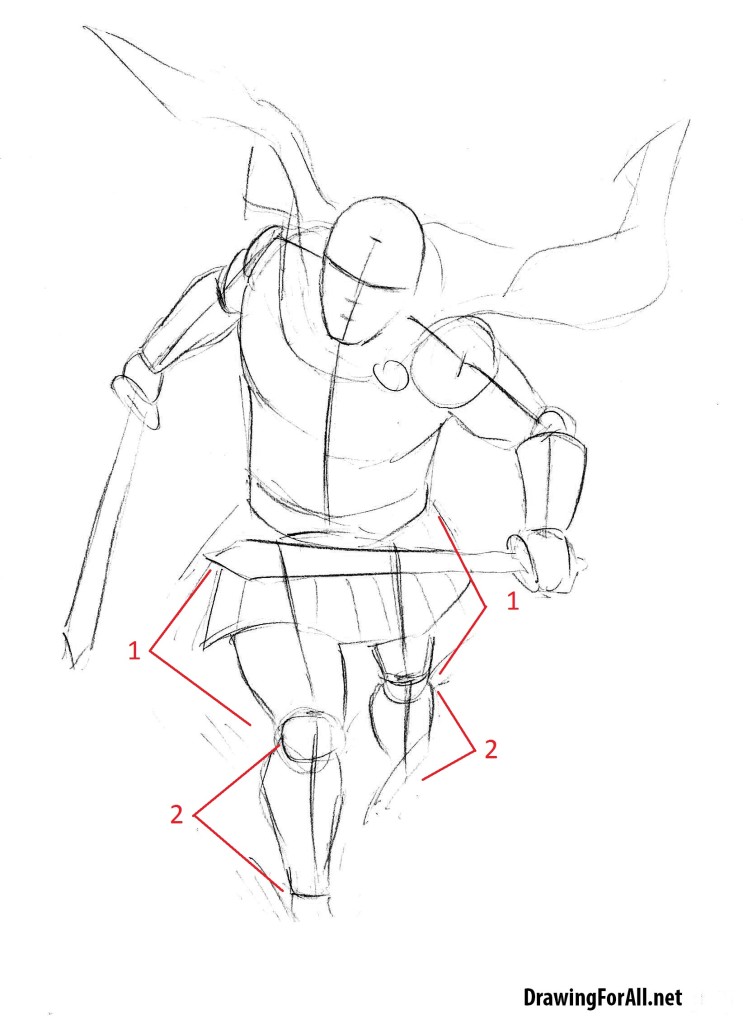
In this step, draw the lower part of the vestments of the Roman soldier. This part is a skirt of thick leather plates. First, draw a wavy line at the bottom. After that, draw several vertical lines towards the torso.
Step 4
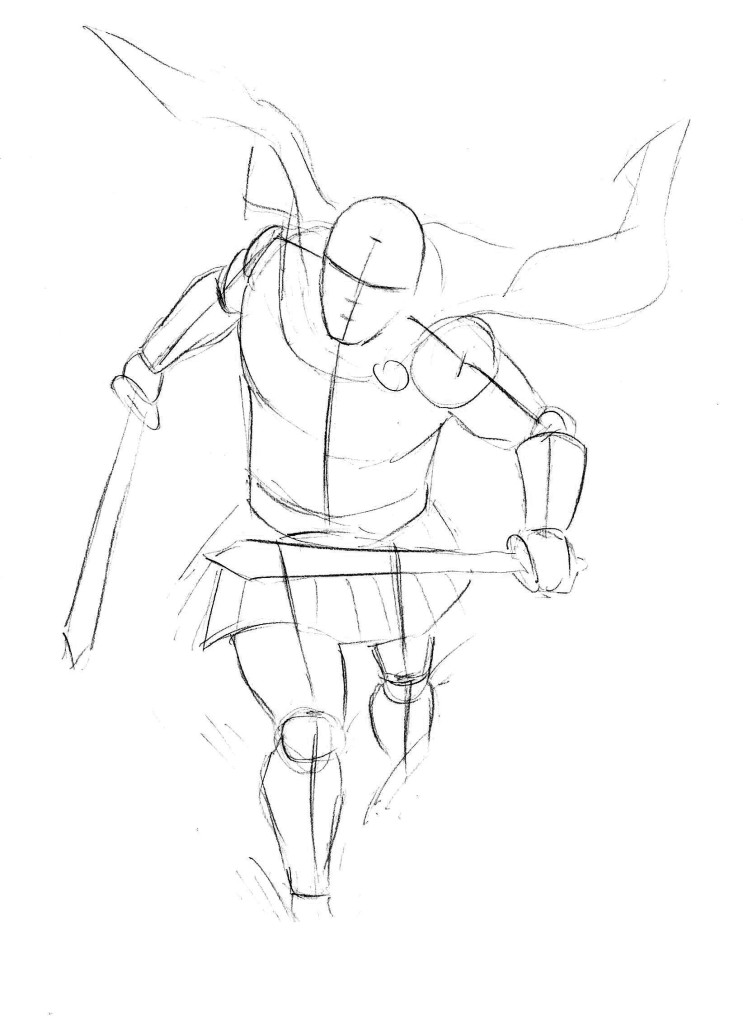
Ok, after the previous step we have a silhouette. And now it's time to start detailing. First we should draw the main parts of the face – eyes, nose, mouth and ears to get the sketch like this:
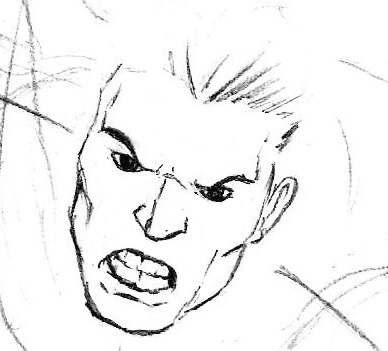
Don't forget that the hair should be drawing in the direction from the hair roots to the hair ends. Note the position of the upper and lower points of the ear relative to the eyebrow and nose
Now draw the wrinkles. The wrinkles help us to convey emotions. Also wrinkles will make our hero more old. Draw the nasolabial folds and the wrinkles in the forehead. You can also see a large number of wrinkles around the eyes.
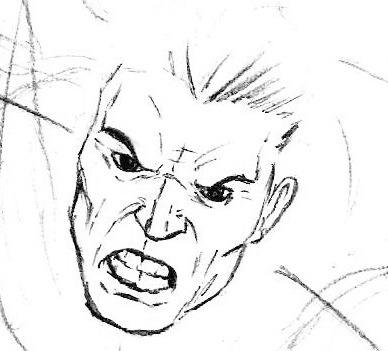
So in the end of this step we have a this result:
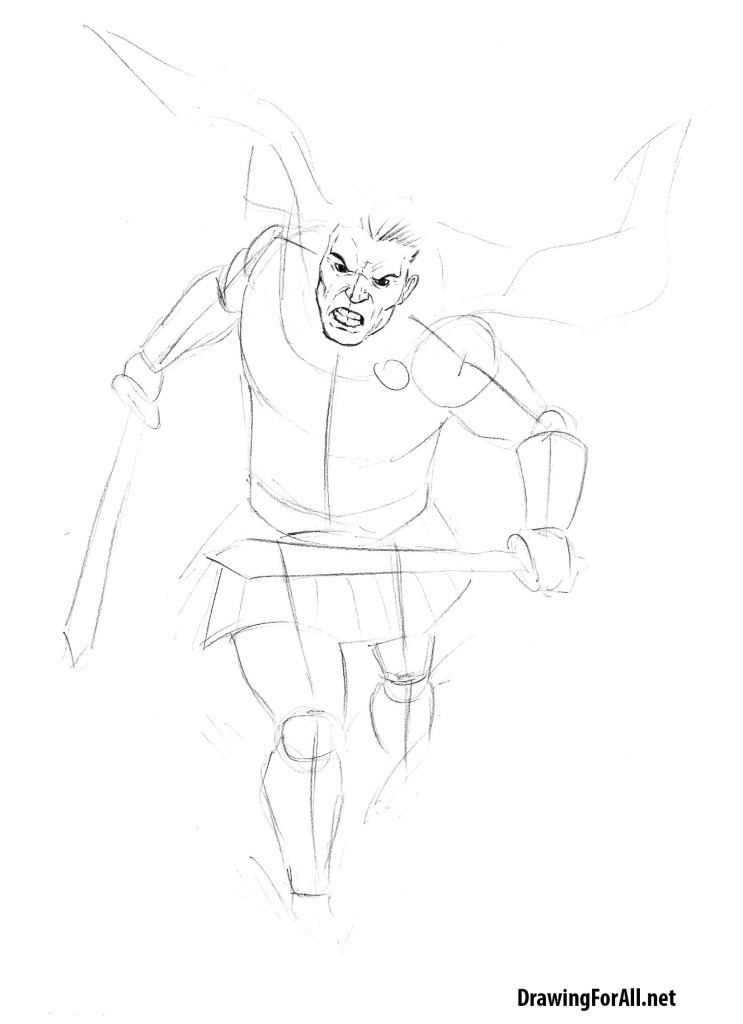
Step 5
Let's work on the hair of a Roman soldier. You can see short hair in the temple area and much more long in the forehead and the top of the head. Looks like something similar to the ancient version of the like haircut "undercut".
In addition, the hair in the temple area is much darker. The hair should be to draw using the usual straight lines. In temples line you should draw more often and tighter. Also you can lightly paint over these areas with a soft pencil.
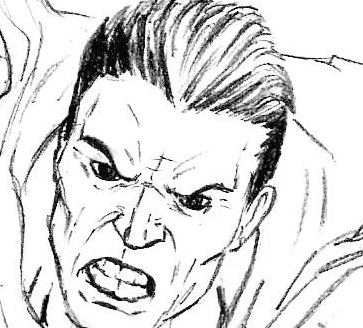
Also in this step we will draw the neck. You can draw just a few straight lines to do this part of the body.
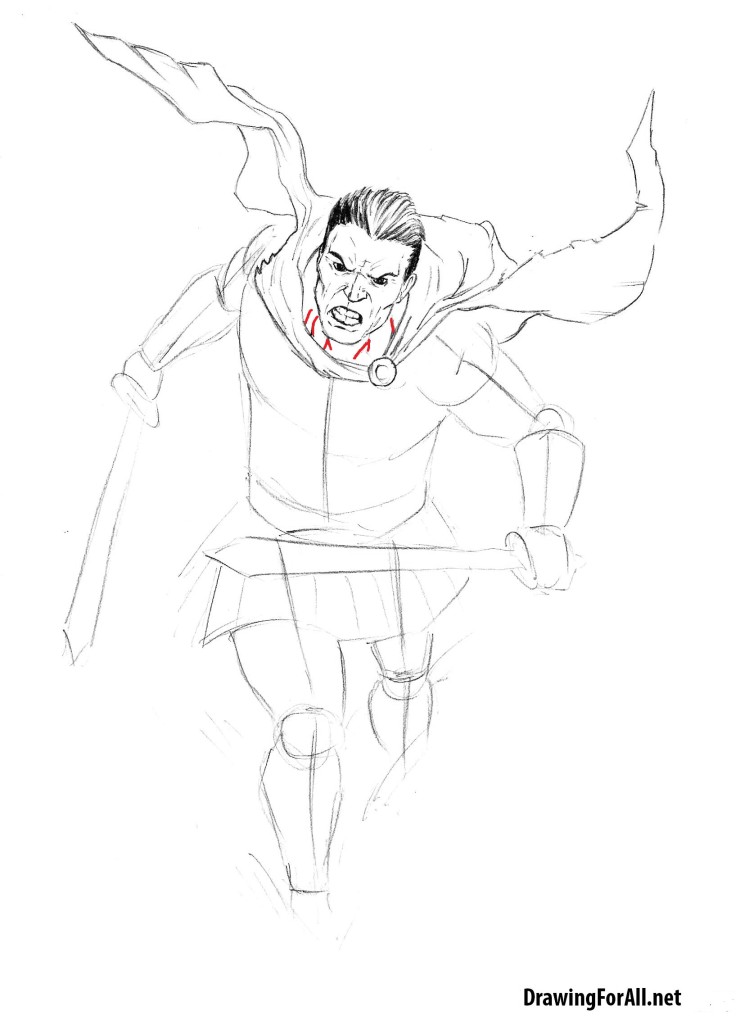
So we have a final action of this step – drawing of the mantle. Please note – near the buckle a lot of folds of fabric. In our illustration, the gown torn to the right of us, but you can cause damage to the fabric where you want.
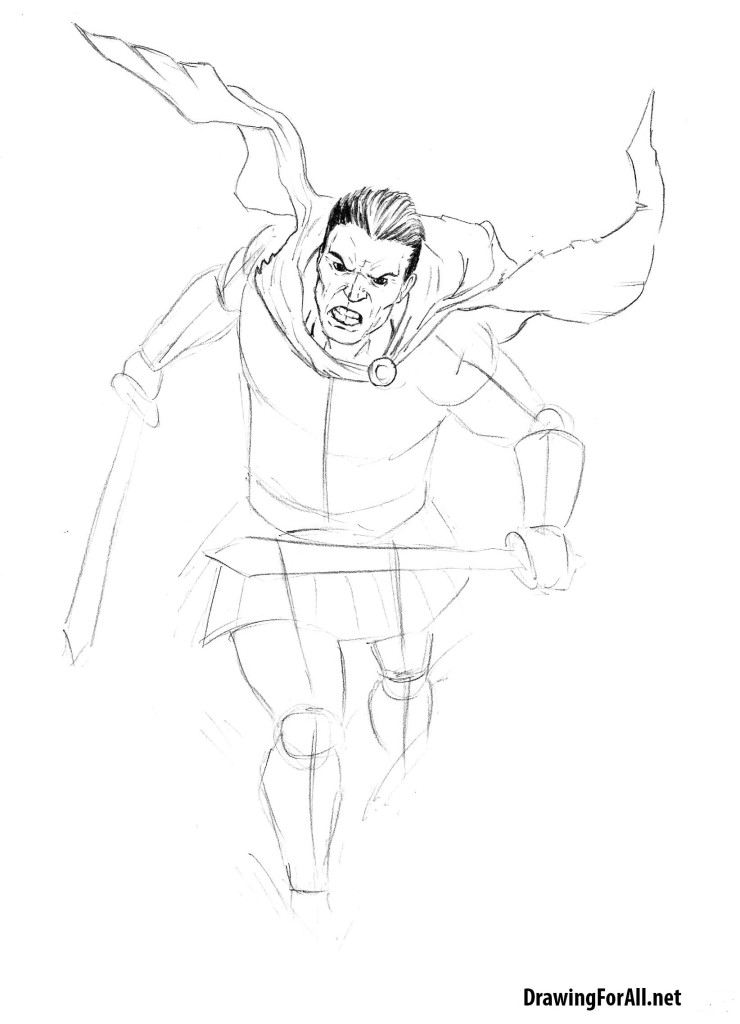
Step 6
Ok, in this step we will draw the hand of the Roman soldier in details. It's really small and simple step. First let's find out on this picture two massive muscles of the shoulder:
- The deltoid muscle of the shoulder. You should outline the contours of this area and erase the extra lines from the previous steps;
- The biceps. This muscle is a flexor of the hand at the elbow joint. You should follow the same steps as in the case of biceps.
The forearm covered with fabric so we can't see the muscles of this part of the arm. Don't forget to draw the blade. Make sure that the blade have a right perspective (wider to the front edge).
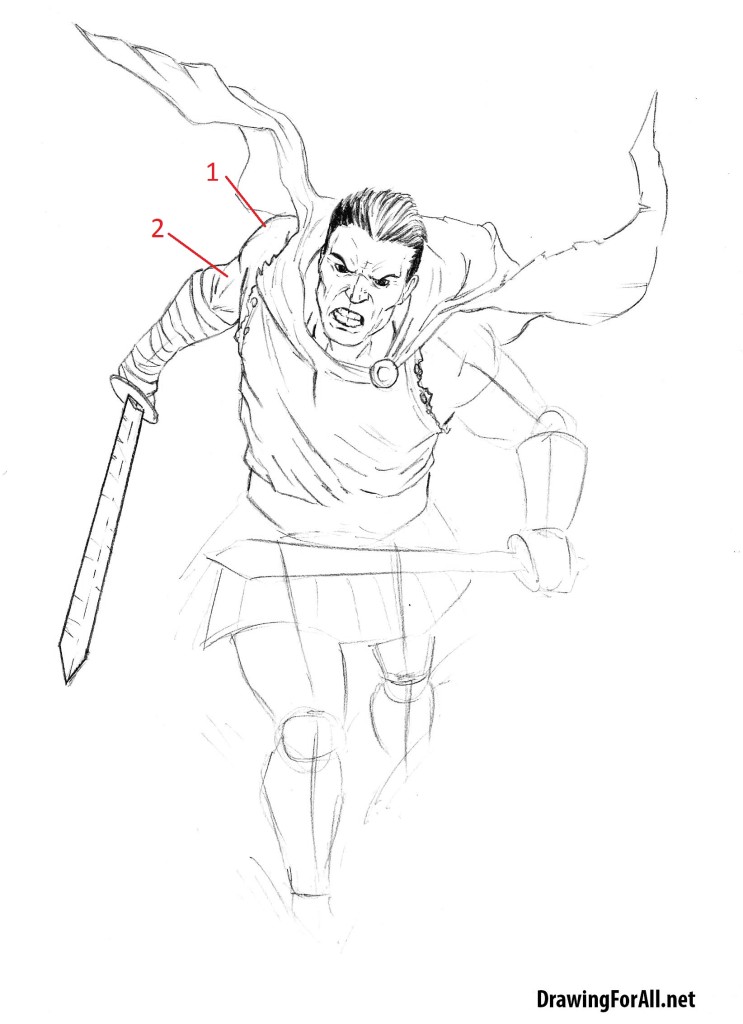
And we will draw details of the body (we mean the upper part). You can see the lines that we can very tentatively attributed to the lines of the pectoral muscles. You can see this musles at this drawing tutorial (step 6).
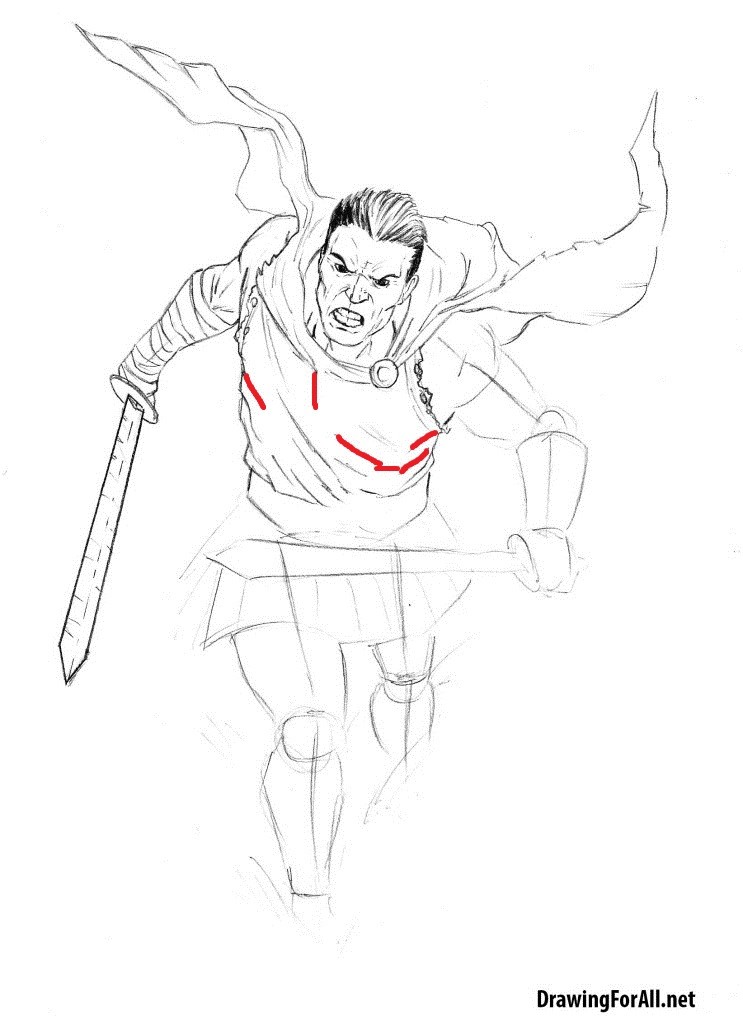
Lines which we have marked in red located in the upper part of the torso. All lines located below are more vertical
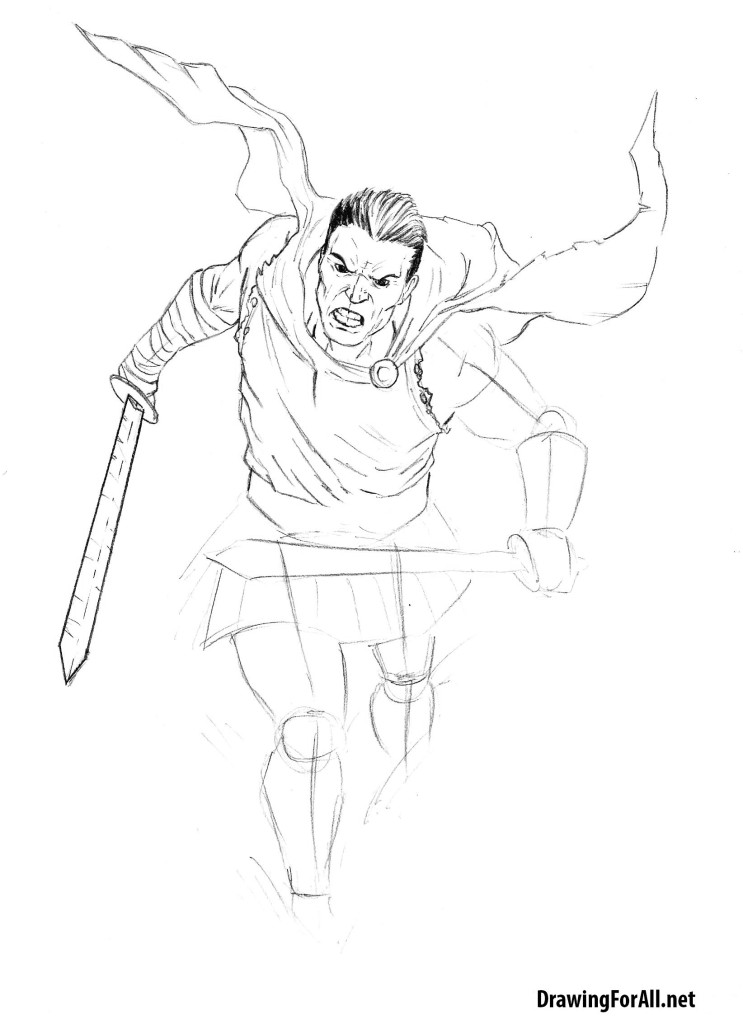
Step 7
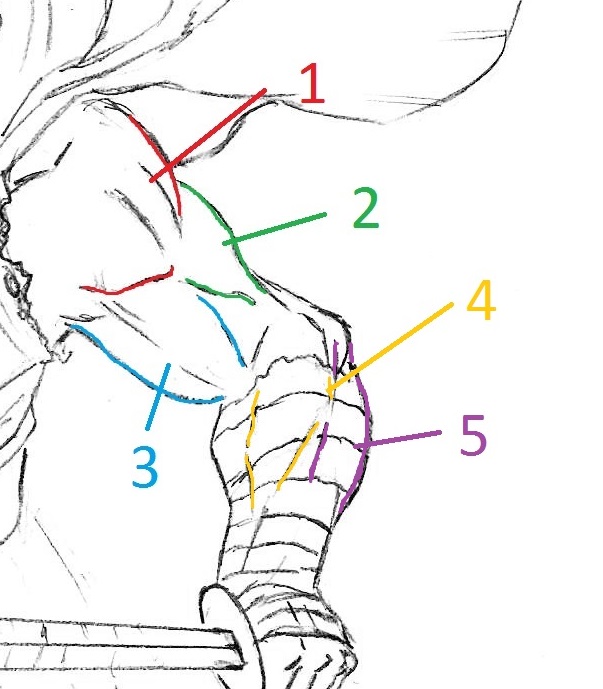
Continue to draw in the details part of the body of a Roman soldier. And in this step we will work to detail hand (right of us). We can see this muscles:
- Deltoid muscle. This muscle forms the rounded contour of the shoulder;
- The triceps brachii. This is main extensor of the shoulder;
- The biceps. This muscle is powerful flexor of the hand ;
- The brachioradialis muscle. This muscle is involved in flexion of the elbow joint. As you can see, the arm our soldier is very tense. That's why the brachioradialis muscle is very noticeable even through the fabric ;
- The ulnar extensor muscle of wrist. As well as the brachioradialis muscle is clearly visible through the fabric.
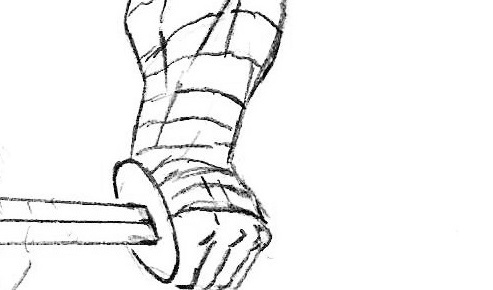
Another important thing is drawing of the palm. As you can see we have a clenched hand.
And the final piture of this step looks like it:
Step 8
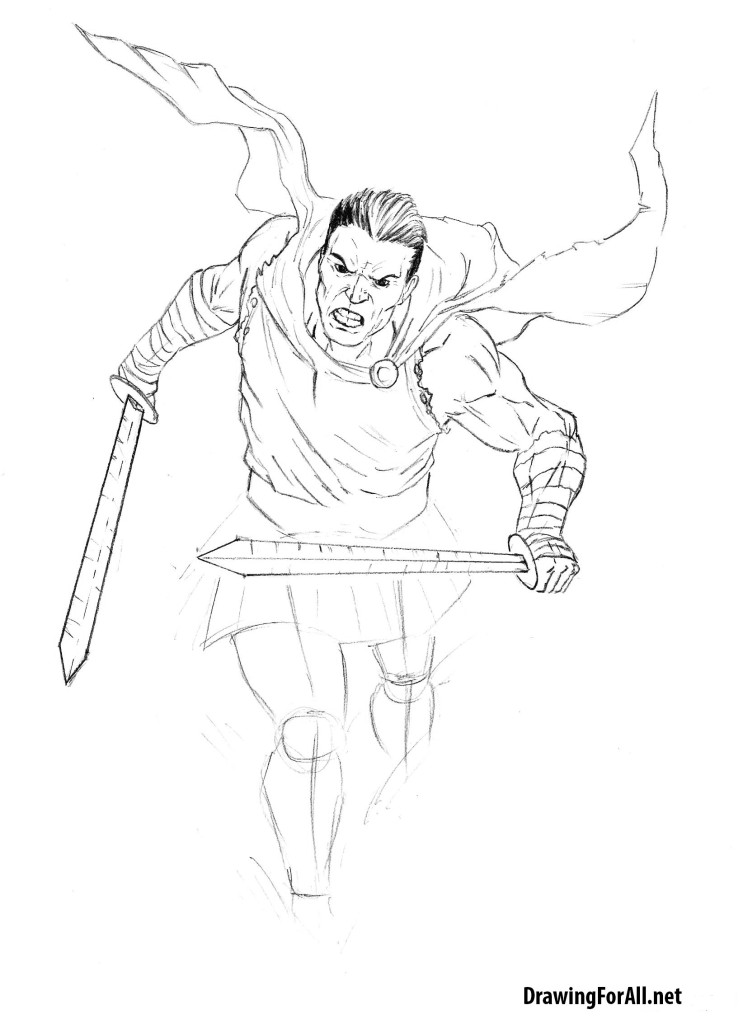
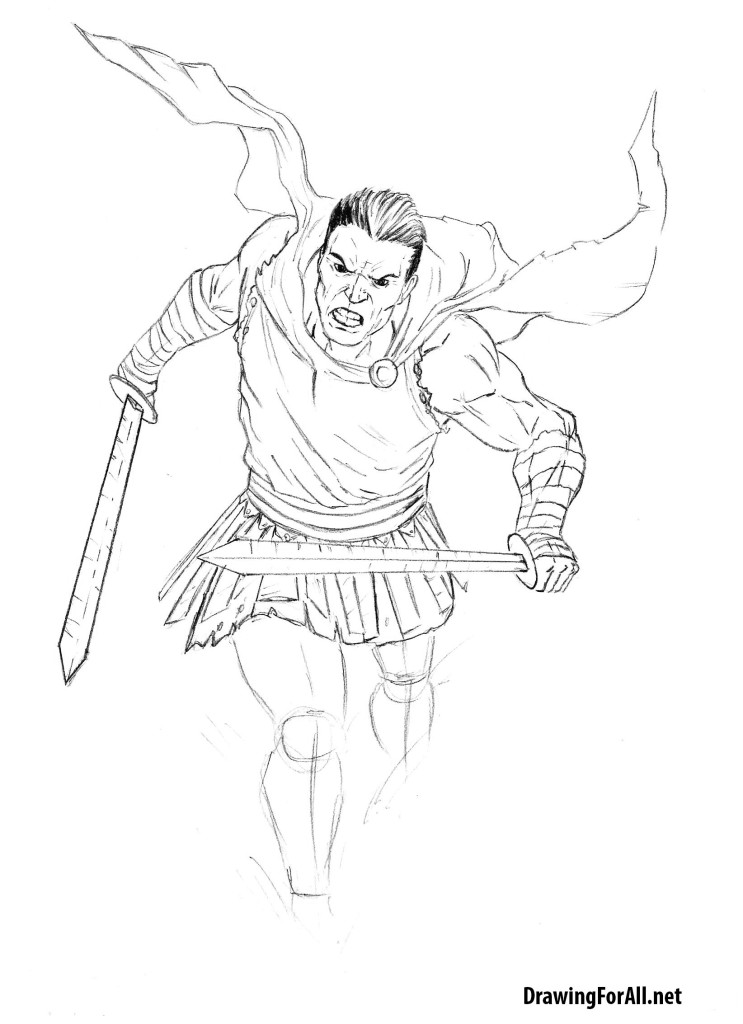
We ourselves do not believe it but this step will not be schemes and close-UPS. First, draw the belt. As you can see, it consists of four horizontal lines. Below the lower belt line position the outer layer of leather plates. Under the outer layer is the second layer that looks like a ordinary fabric.
Step 9
So we practially have a final of this drawing lesson. The quadriceps femoris occupies the entire anterior surface of the thigh. We have marked it in red. Also we can see a patella. The patella is a small bone that covers the knee joint and does not allow him to move laterally. We marked it in green.
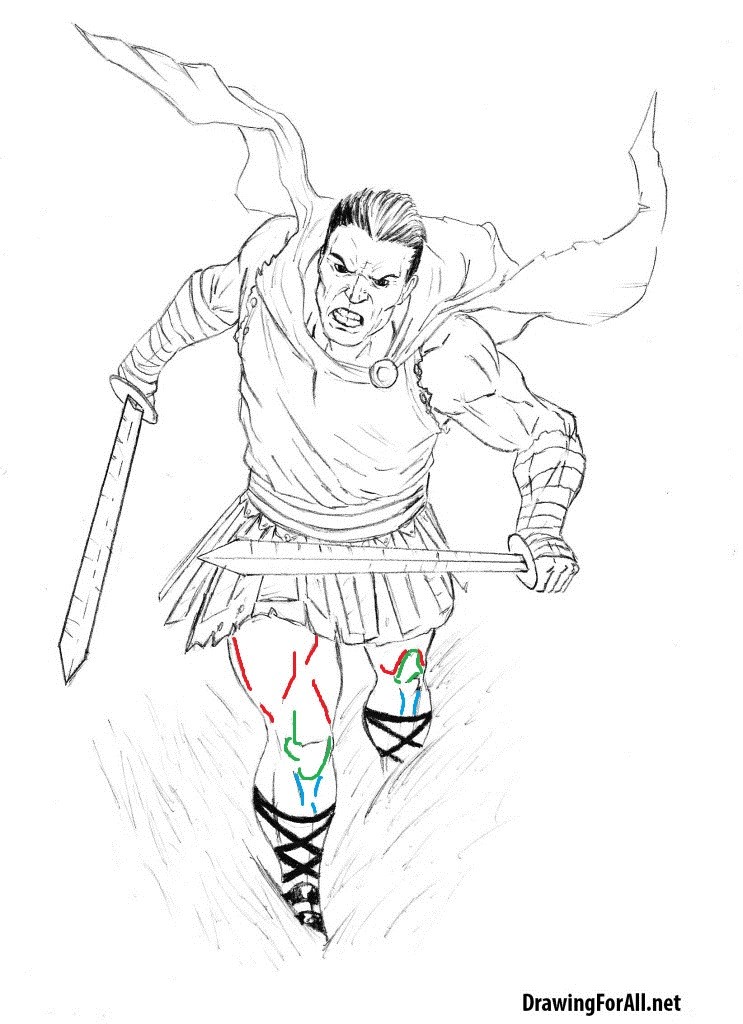
Now it only remains to draw straps at the calf and oblique lines, which we designated the grass.
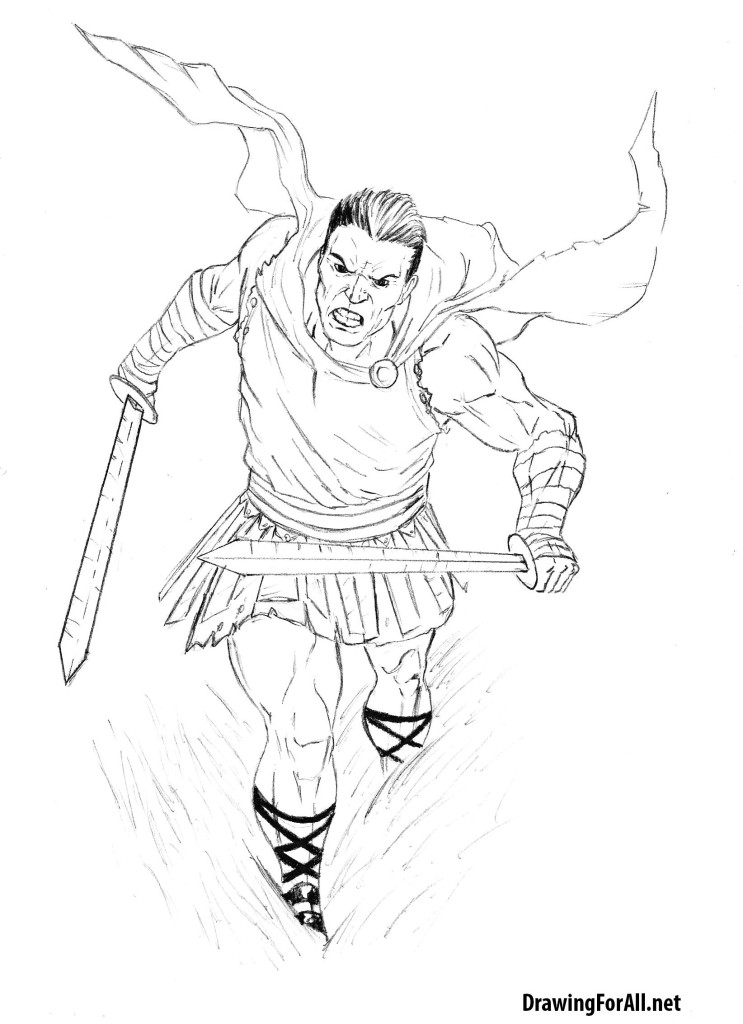
Step 10
The drawing lesson was quite difficult. But the shadows here are very simple. You only need to draw the contours of the shadow and then paint them a dark color.

Source: https://www.drawingforall.net/how-to-draw-a-roman-soldier/
Post a Comment for "How to Draw a Roman Soldier Step by Step Easy"